Monday, November 29, 2010

Christmas Cards - Embossing


Hi, there! I've been so busy fulfilling my card orders lately and I just wanted to share with you some little details I've made with these cards. If you are looking for cards to create for mailing this holiday season, this is an easy one. It won't even require you to add extra postage to them.

These cards are measured at 4-1/2" x 5-1/2" that would fit an A2 envelope. My first card is a Xmas wreath. I saw something like this made as a giftcard holder so I figured it also can be a beautiful card. I added the Medallion Stamp #115223 on the background using Crumb Cake Ink pad #121030. It just super impossed the wreath to another level. I just loved it.

Supplies Used:
Cardstock:
- Cherry Cobbler - cut at 4-1/4" x 5-1/2" and scored at 4-1/4"
- Very Vanilla - cut at 4" x 5-1/4"
- Old Olive - die cut with Island Floral die for wreath
Ink:
- Crumb Cake #121030
- Cherry Cobbler #119669
Stamp set:
- Medallion Stamp
- Bells # Boughs #121142-C; #120831-W
BigShot Die:
- Island Floral die #118871
- Textured Impression Folder - Perfect Polka Dots -#117335
- Textured Impression Folder - Petals-a-Plenty #116824
- Tasteful Trim Bigz Die - #120903
Punch:
- Large Oval Punch #118755
Other Supplies:
- Real Red 1/4" Grosgrain Ribbon #109034
- Crystal Effects Glue #101055 - for glitter
- Stampin' glitter- Fine Galaxy - Red


Please let me know if you have any questions or suggestions. Please visit my blog and my Stampin Up Website! Have a nice day!

Wednesday, November 24, 2010

Thanksgiving Turkey Tutorial- Favor


It's the day before Thanksgiving and time is closing in on me. So many things to do, so little time. As I do this quick tutorial, I will have to get back with you on the details. So I'm just posting the pictures for you to follow. I hope you find it instructive.
BTW, I posted some pictures from our Church Thanksgiving Dinner at Corpus Christi last Monday night. It was so much fun putting the table together and seeing how it turned out. Not to mention, the FOOD WAS GREAT!!! Thanks, Mom for helping set up the table :) HAPPY THANKSGIVING TO ALL!!!!!!
Here's the Tutorial:


Please let me know if you have any questions or suggestions. Please visit my blog and my Stampin Up Website! Have a nice day!

Friday, November 19, 2010

Gingerbread Punch Art Treat


Growing up as a kid, I loved treats my mom made. However, there where other goodies that I never could resist. When I found these treats again in the grocery aisle, it just brought back childhood memories with my siblings. Whenever we had this at home, we would grab them like chipmunks to a nut and hid them :) Hiding some so we would save some for later. If one finished their share, sorry for you, you can't have mine.

Anyway, I'm talking about Ding Dong's by Hostess! I took a bite and it literally time-warpped me back when I was 10. This was the perfect treat size for my 2-1/2" circle punch #120906. And they're already individually foil-wrapped! That's awesome!


This project was also made in my workshop with Judy and friends last night. It was a fun evening with them and we intend to do it again. I taught them the Designer Tote Box, Santa Matchboxes and these Gingerbread Punch Art Treat. Really pure fun! Judy makes really good mashed potatoes that had cheese and bacon..mmmmmm. Thanks for the dinner Judy. Not to mention the tri-tip and the roast chicken... fantastic.

Supplies Used:
- 2-1/2" circle punch #120906 (for the head)
- Itty Bitty Shapes Punch Pack #118309 (circle shape for the eyes)
- Tasteful Trim Bigz XL Die #120893 (for the head band)
- 1-3/4" Circle punch # 119850 (for the smile)
- Heart to Heart Xl punch #119881 (for the cheeks)
- 1/4" Grosgrain Ribbon - Real Red #109034
- Stamping sponge #101610 (to sponge whisper white ink onto the edges)
- Whisper White Ink Pad #101731 (Craft)

Very easy project for beginner crafters. Your kids would love to make them too :) Make them as ornaments or gift tags and watch your friends in awe.

Please let me know if you have any questions or suggestions. Please visit my blog and my Stampin Up Website! Have a nice day!

Wednesday, November 17, 2010

Turkey Punch Art Class and More


Hi! Do you want to learn more of my Thanksgiving Punch Art? I'm having a class!!! Come and learn all my Thanksgiving turkey punch art, specially what I just created this season. You already had a glimpse of my Turkey Owl last week. Here's a turkey punch art I made which you can put on each plate on your Thanksgiving dinner table. Isn't he so cute.


I also made a Turkey Punch Art with a dessert. Wouldn't you want this on your Thanksgiving table? Guess what's in it! Learn more in my class so hurry and sign up now before it gets full! You can use my tools and make as many as you want for your dinner table!!! Just bring your paper! Come see at first hand, my upcoming Xmas punch art and Xmas boxes in person!!
Where: At my home
When: Friday Night, November 19th
Contact me for more details.

Please let me know if you have any questions or suggestions. Please visit my blog and my Stampin Up Website! Have a nice day!

Saturday, November 13, 2010

Turkey Owl Punch Art


Every year, my Thanksgiving is not complete without a turkey punch art. Thanks to the Owl punch #118074, it's easier to create him this year :) Isn't he so cute. Well, I'm going to show you how he's made.

First, you will need all this punch:
- Owl Punch #118074(for the turkey's body and the black of the eyes)with ears cut off
- Large Oval Punch #119855(the turkey's butt)
- 1/2" circle punch #119869(the eyes) \
- 3/4" square punch (the top hat)
- window word punch #119857(the rim of the hat)
- Itty Bitty Shape Punch Pack #118309- the 4 petal punch (under the beak)
- Butterfly Punch #119848- for the feathers
and
- cut 1/4" square for the beak

Cardstocks used:
- Feathers - Real Red, Daffodil Delight, Old Olive, Pumpkin Pie
- Body - Crumb Cake
- Hat - Basic Black
- Turkey Waddle - Cherry Cobbler
- Turkey Butt - Chocolate Chip Brown


Instructions:

Step 1: Adhere owl to the large oval as illustrated


Step 2: Adhere the eyes and the waddle.


Step 3: Cut the Window Word punch piece lengthwise in half. Then cut a 1/3 off. Use the 2/3 piece as the rim of the hat.


Step 4: Adhere the hat then cut the Butterfly punch piece in half as feathers.


Note the position of each feather. The Real Read and the Daffodil Delight are upside down and the Old Olive and Pumpkin Pie CS are rightside up. Then follow the illustration below on where to place the specific point position of each turkey feather pieces.


Then you have your Thanksgiving Turkey!!!! Don't forget his beak and highlights on the eyes with a white gel pen. Have fun!!!


Please let me know if you have any questions or suggestions. Please visit my blog and my Stampin Up Website! Have a nice day!

Friday, November 12, 2010

50% OFF Stampin' Up! Starter Kit - Join NOW


Join Stampin' Up! and my Creations on Paper Group!
We'd love to welcome you to the "Stampin' Up! family" and get to know you!

JOIN STAMPIN' UP! FOR 50% OFF THE REGULAR STARTER KIT PRICES

FROM NOV. 15 - 30, 2010

If you've been waiting to become a demonstrator and start building your business, there isn't the best time but NOW!!! With $87.50 you get to start creating and sharing, as well as earn as much as 40% in income and benefits! Remember, just under $100 to start! WHAT A DEAL!!!!!!! I've never seen it this low before.

HURRY, COME JOIN ME! LET ME TEACH YOU how to turn your passion into $$$$$. This deal is only available until end of this month!!!

Contact Me and CLICK HERE to JOIN


Please let me know if you have any questions or suggestions. Please visit my blog and my Stampin Up Website! Have a nice day!

Tuesday, November 9, 2010

2010 Holiday Faire Display Tips and More


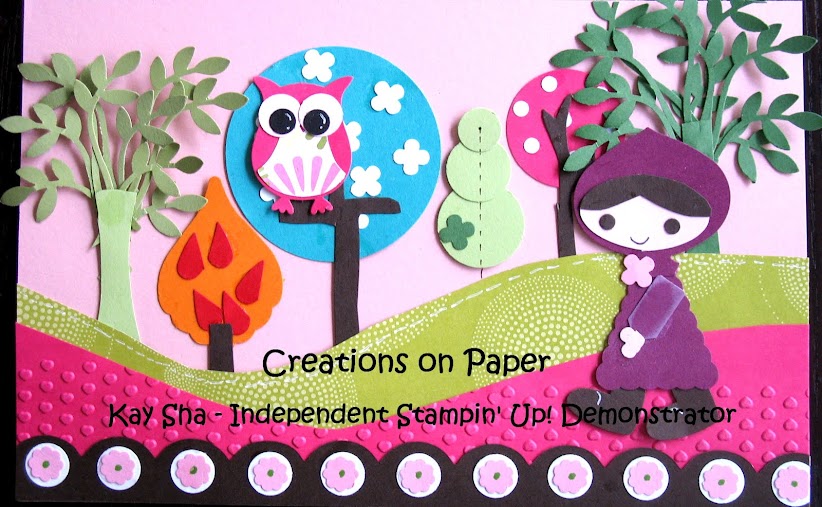
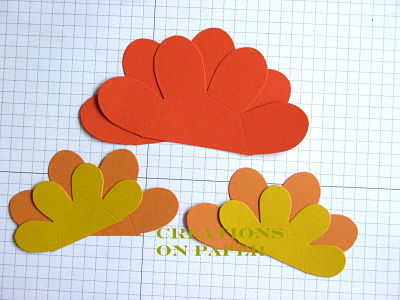
On this post, I'd like to share with you how you can setup a head-turner display. Here are some tips on how to bring out the charisma of each paper craft made with SU! supplies. We all know how SU's Cardstocks are so vibrant and colorful. The only way to get a dramatic outcome is bringing out your best platters. Platters are a best way to make food delectable, why not use it with your paper craft or project displays. With the white platters, black was the contrast element. So I just bought some black disposable table covers and it did the job perfectly. You want to go for dramatic, go BLACK!!!

My first photo shows a 2-tier plate which I filled with Petite Square Boxes. Everyone looked with curiousity and had to open them. They were conversation pieces that Sold Out too! (I'm taking this picture a couple of hours before closing).

Here's my Santa matchboxes I sold last year and are sold out again! He lay nicely on my other 2-tier platter. Many of you asked for my Santa Box instructions! Here is my LINK to my instructions.
They're my projects last year. So check out other matchbox items I had for the Holidays! I have a reindeer matchbox, too!


Here's another tip to attract customers. Bring out those Hershey Kisses and spread them around the table. That's like honey to a bear :) We spread it around the plates and see how they would attract customers. It' free and a friendly gesture. I like the way the chocolate kisses blended with my tags :)


I also got those tins in bulk purchase in SU!'s Clearance Rack #124239. They come in a 5 pack. So hurry and get them. I think there is still time to order them. I gave this away with my own personalized ribbon for every $20 purchase. It's a cute promo gift with purchase. I make sure that I always provide a small token in my Craft Faire. Last year, I gave away plush toys. Anyway, something you want to think about on your next faire.


Here is another way to get curious lookers. Bundle your cards in a basket. Anything bundled like this attracts bargain lookers.


We all know that we need to price our items. It would be hard if you don't. It would be crazy to keep track of prices when you have 5 customers asking for them at the same time. So, here's the best and neat way to post them. I found this acrylic displays in Crate and Barrel store that closed in one of the malls. They were selling there display fixtures and this were sold at 50 cents each. I grabbed them and printed them out with the font Crate and Barrel used on there display.
It's "Arial Bold" font. I also put a description on how they can use my boxes. Ain't that neat! Looks so professional! You can also get them in your Office Supplies store.

BTW, don't forget your sign up sheets for your Workshops!!!


Last but not the least, here's our neighbor, Susan Hesse. Her booth beside us, was a knock out. She sold her jewelry with her daughter. I had promised that I would feature her in my blog if she featured me in hers..hihi. Anyway, our booths complimented each other. Her jewelry with our boxes would be a perfect holiday gift! Isn't that Great!


BTW, I stepped out for a moment from the faire and Raidis was asked to be photographed by the Local Newspaper. WOW!!! Our booth was one of the choosen displays to be featured in the Holiday Craft Faire article. Eeek, why did I have to step out on that moment.. geez. Anyway, I can't wait to see it in the news.

Please let me know if you have any questions or suggestions. Please visit my blog and my Stampin Up Website! Have a nice day!

LinkWithin

Blog Widget by LinkWithin