Showing posts with label Valentines. Show all posts

Sunday, February 12, 2012

Valentine Cupcake


It's soon here and can't resist making anything with hearts! I have my cupcake tutorial available for purchase.

For the heart on top of the cupcake, I used 2 pieces of hearts using Full Heart Punch #119883 (front and back) and 1 piece of the Embosslits Die Scallop Heart of Hearts #117332 to put in between the Full Heart pieces.

Use a toothpick and insert it through the heart and then insert the other end of the toothpick through the top of the cupcake box. To seal it in place, adhere a ribbon on the base of the heart with glue gun. If the toothpick sticks to long inside the box, just cut it with scissors from inside the box.

Notice that I used a piece from the Blossom Bouquet Triple Layer punch #122464 and placed the piece on the surface of the cupcake :)

Supplies used:
Cardstock:
- Pink Pirouette
- Chocolate Chip Brown
- Very Vanilla
- Glitter Paper (Red)


Please let me know if you have any questions or suggestions. Please visit my blog and my Stampin Up Website! Have a nice day!

Wednesday, February 8, 2012

Valentine Owl Pillow Boxes


Less than a week now before VDday!!! Here's a quick and cute project for your Valentine favors. It's so cute I'd eat it kinda project...hehe. Enjoy making them.

Supplies Used:
Cardstock:
- Cherry Cobbler red
- Glitter Paper - Red- #121790
Punch:
- 3/4" Circle Punch #119873 (for the owl eyes)
- Small Heart #117193 (for the owl heart eyes)
- Full Heart #119883 (for owl wings)
- Heart to Heart #119881 (for the beak)
- Scallop Edge Border #119882 (for the owl feather)

BigShot Die:
- Pillow Box Die #113466 (for the owl body)

Ribbon and other Supplies:
- 5/8" Organza Ribbon - Whisper White #114319
- ribbon featured not SU!
- you may use and 5/8" ribbon
- Crystal Effects Glue #101055
- Glue Gun

Please let me know if you have any questions or suggestions. Please visit my blog and my Stampin Up Website! Have a nice day!

Saturday, February 4, 2012

Chocolate Covered Strawberry - Vday Giftcard Box Tutorial


Hey, there! Heart Day is coming soon and here's a quick box project you may enjoy and whip up for your love ones and special friends :)

I also made the Chocolate covered Strawberry embellishment. I made one like White Chocolate and another one like Milk Chocolate. Don't they look yummy!!! I already have so many orders for these boxes and it's just so easy to make!


Make these boxes a family favorite or have them handy all year round for any occasion for any treat or gift and get all the compliments. Of course you can fill them with goodies like chocolates, mints and wrapped candies. It's the size of a regular giftcard! Sell these at your fairs and it'll surely be a sell out. This is also a great project for your next Hostess Class!!

For the tutorial of the box and the chocolate covered strawberries, click the "BUY IT NOW" button for $4.99. A .pdf file will be sent via email disclosed by paypal within 24 hours. If you don't receive the file within 24 hours, please contact me. If you are my downline, you get all my Tutorials FREE!!!


Please let me know if you have any questions or suggestions. Please visit my blog and my Stampin Up Website! Have a nice day!

Sunday, January 22, 2012

Valentine Ripple Heart Box


Hearts, Hearts, Hearts...!!! Do you know I'm a heart person myself. I like things with hearts or anything that look like hearts even. On this share, I used my favorite Embosslits Die, Scalloped Heart of Hearts #117332. Not only does it emboss hearts but it also cuts your scalloped heart to fit your punch heart pieces :) It always makes a big impression on any heart project.


Another favorite highlight is the Simply Scored Scoring Tool #122334!! I hope you get this tool because you can do more with 3d projects with ease and control :)

TO DO THE RIPPLE EFFECT ON THE EDGE OF THE HEART:

Take a 1-1/2" x 12" cardstock (I used the Very Vanilla on this project), then score them at 1/2" interval on one side and 1/2" interval on the flip side starting at 1/4". Then cut the cardstock at 3/4", length-wise, getting 2 pieces. Fold the scores to get ripples.

You will need to cut the cardstock in halves again by hand... if you are not confident about cutting them by freehand... you may use your cutter (but it will be hard since you already scored them). Don't worry about an uneven cut :)

Take your Scalloped Heart and glue one side of the heart with glue gun then position your rippled cardstock to go clockwise around the heart. You may need to do this process half side of the heart at a time since the glue gun dries fast. Remember to position the ripples close to the edge of the heart and position ripples apart from each other. Positioning these ripples around the edge of the heart may need practice, so be patient:) Don't worry, it's not as hard as it looks. Have fun!!!

I applied glue gun onto the tip end of the heart and the valley end of the rippled edge of the heart onto the box.


Here's another box color. It looks good at any color for any occasion or event :)


OTHER SUPPLIES USED:
Big Shot Die:
- Bitty Box Envelope #115967
- Embosslits Die - Scalloped Heart of Hearts #117332
Punch:
- Small Heart #117193
Paper:
- Glimmer Paper- Silver - #124005
- Glimmer Paper- Red - #121790

Please let me know if you have any questions or suggestions. Please visit my blog and my Stampin Up Website! Have a nice day!

Wednesday, February 16, 2011

Mini Heart Box with Melon Mambo


Hi! How was your Valentine Mini Heart Box Classes? Mine went so well with these design and color too. Melon Mambo with Early Espresso is one of the best combo colors out there. I also embossed the cover with the Elegant Lines Textured Impression Folder #119277. It came out perfect! Looks like chocolate to me!! Chocolates Anyone?

The Pink Pirouette box cover was made using the Love Impressions DSP #121780. Loved the embossed little hearts! To add a little flower, I used the Boho Blossoms Punch #119858 with the Basic Jewel Pearl embellishments #119247

Click here for other SAMPLES.

Please let me know if you have any questions or suggestions. Please visit my blog and my Stampin Up Website! Have a nice day!

Saturday, February 12, 2011

Mojo Monday Card 177 - Valentine Card


You can see that this is my favorite Valentine poem..hihi...I've used it a couple of times on other post.
The roses are red
The violets are blue
The chocolates are as sweet as can be
As you can see
That I declare
That there's love in the air
Happy Valentine's Day, Bonami!!!

So very sweet! Anyway, I wanted to make an all red card but my elements just got lost in it so I decided to put a neutral contrast, Basic Black. They say you can't go wrong with black, right? In my picture, you can't see the Framed Tulip embossed on the Black CS. Trust me it's there :) I just wish my camera takes better pictures :( Also, I just loved the way the card looked with the DSP background which made me make an envelope lining of it.

TIP:
You must be wondering how I made the Framed Tulip embossed on a small rectangle. Pass your paper through the BigShot with the embossing folder once. Then reverse the paper to emboss the other side of the frame. First, align the first impression to the image of the embossing folder, then pass it through only to make that remaining side of the frame. Then reverse your Bigshot handle to release the impression folder.

Recipe for the Love Card:

Cardstock:
- Basic Black
- Cherry Cobbler Red (for the rose)
- Very Vanilla
- Chocolate Chip Brown (for the borders)

DSP:
- Love Impressions DSP #121780 (2011 OCM)

Stamp Set:
- Occasional Quotes #120142-Clear or #117048- Wood (Hostess Set level 3)

Ink Pad:
- Early Espresso #119670

BigShot:
- Textured Impression Folder - Framed Tulips #121809
- Embosslit Die - Scallop Heart of Hearts #117332
Punch:
- Two Step Bird Punch #117191 (used wings for rose petals)

Other Supplies
- Antique Brads #117273
- Jewels Basic Rhinestone #119246


Please let me know if you have any questions or suggestions. Please visit my blog and my Stampin Up Website! Have a nice day!

Friday, February 4, 2011

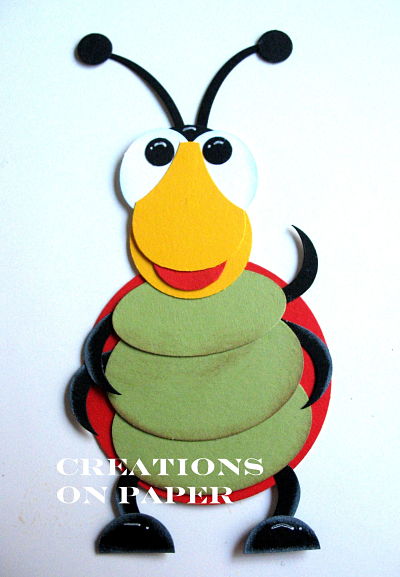
Lady Bug Jr Punch Art


Need I say more ??!!! Come join me in my punch art class this weekend. I know it's the Superbowl weekend..uhuh.. but some of you who may be free AFTER or DURING the game can come over and have a celebration or grump..(for those whose team didn't win). I'm not going to say who I'm routing for (my friends do).. but come see me and just talk about the game, the commercials in it and the half time show while we do our punch art.

These 2 darlings are just waiting for you to make them and Valentines Day is counting down!!! If you don't have a card yet... Here's your chance to make them in my class!!! We are making 4 different bugs!!! So HURRY!
BTW, that's SUNDAY, Feb 6th. SEE YAH!!!
ps. Let me know if you want to join the Saturday Class (the day before Superbowl).

Please let me know if you have any questions or suggestions. Please visit my blog and my Stampin Up Website! Have a nice day!

Sunday, January 23, 2011

Valentine Mini Heart Box Class and More


Hello!!!! I'm back! Been really busy this week at the store and with my folks. I totally had to put Creations on Paper aside for a moment. Times like this makes it really hard for me to juggle. You know what I mean.... although I took a break, I still think of you. I've heard that some of you come to my site everyday to check, hoping that I would have something new or some new creations. I am touched with this and my feelings are mutual.
When I'm gone, away from blogging, my mind lingers toward it and plans for the next post. I also wake up in the morning and it calls me, however, I have to say... later.

Anywho... I'm here, again. This time I'd like to share with you my class this weekend. I met 2 new wonderful ladies, Patty and Phyllis. They reminded me of Thelma and Louise who are such friends that they continue catching up in their lives while doing the projects in the class. That was very entertaining for me!!! I loved how their friendship just went through my eyes and how comfortable they were. I just love these kinds of ladies who attend my classes :) Most importantly, we all had fun and mind you, alot of laughter!

Here were the 2 little note pads with pens as favors for them when they attended my class. I used the Hugs & Kisses Suite:

- Love Impressions DSP #121780
- Stamp set XOXO #121973 Clear or #121909 Wood
- Glimmer Paper Red #121790
- Love Impressions Rub-Ons #121886
- Grosgrain Polka Dot Ribbon #115608 (Clearance rack NOW)
- Textured Impression Embossing Folder - Framed Tulips #121809
- Small Heart Punch #117193
- Large Oval Punch #119855
- Decorative Label Punch #120907
- Jewel Basics - Rhinestone #119246
- Dimensionals #104430
- Real Red CS
- Whisper White CS
- Small Pens and small notepads(any supply or craft store)


Here are also the items we made in class :) Aren't they cute!!!! I had to teach Phyllis how to make the Fancy Flower Punch - Rose! She did a great job on her first try!!! (rose in the middle).. cutie :) BTW, great idea with the leaf on the Mini Heart box, Phyllis! Patty's an expert crafter, need I say more... awesome craftmanship. She gave me tips too! Thanks, Patty W.!


Please let me know if you have any questions or suggestions. Please visit my blog and my Stampin Up Website! Have a nice day!

Tuesday, January 18, 2011

Love Impressions Heart Boxes


The roses are RED, the violets are BLUE, and the Chocolates are as SWEET as can be..... I used the "Love Impressions" DSP #121780 from the New 2011 Occasions Mini Catalogue.

Here are more boxes that made me addicted to make them when I saw how lovely they were with the new Red Glimmer Paper #121790. I love, love, love this glimmer paper. It's so easy to work with, too! I hope SU! makes more colors with them.

I also used the Rub-Ons #124496 (also in the New 2011 Occasions Mini catalogue) that were given to me free by SU! Thanks, Stampin' Up!

The rub ons were used on Whisper White then I used the 3/4" x 15/16" oval punch. Then adhered it on the box with Dimensionals. The glimmer punched hearts were made with the Small Heart punch #117193


To make these enticing boxes, click HERE. Warning: You can get addicted to making these boxes.

Please let me know if you have any questions or suggestions. Please visit my blog and my Stampin Up Website! Have a nice day!

Sunday, January 16, 2011

Pillow Box Owls


Whew.... was up late all last night finishing tutorials after a class. My eyes were just seeing double. So I had to take a break from the hectic schedule I made myself.. duh.. and went through all the comments in my blog :) This time I saw Teri's comment. She's just talented and so kind to share her projects in her blog, I decided to feature one of them. She had a class making these owls, so I think. But when I came to visit her blog, I can't find the link. Anywho, here's Teri's blog so you can browse through her stuff , live from Hawaii:)

She also said that these were also an inspiration from someone else (I forget). But, I tried making my own version with the 2 owls on the right :) hihi... cutie pie.

They're now one of my Valentine Treats this year :) I haven't used the pillow box die for almost a year now and it's about time I bring that baby out!!! Ain't it great to find something in your box, stashed away and later realize you still need it!!! Thank goodness!

Here's the deal, I'm not telling how I made the pink owl with the big eyes, just because Teri's having a class on that. So I made the other two that I can share.

Supplies Needed:
Punch:
- 3/4" circle punch #119873(for the white of the eyes)
- 2 Step Owl punch #118074(medium circles for the black of the eyes)
- Scallop edge punch #119882 (for the DSP)
- Full Heart Punch #119883 (cut in half for the wings)
- 5 petal punch #119880 (use only 2 petals for the feet)
- Heart to Heart punch #119881(use the long heart for the beak and the fat heart for the tag caption)

BigShot Die:
- Pillow Box Die #113466

Cardstock:
- Real Red
- Melon Mambo
- Pumpkin Pie#105117 or Peach Parfait #119793
- Whisper White
- Pink Pirouette
- Chocolate Chip Brown

Other Supplies:
- 2 way glue pen #100425
- Crystal Effect glue #101055 (to glue the box together)
- SU! Dimensionals #104430
- Jewels basics - Rhinestone #119246 & Basic Pearls #119247
- White Gel Pen #105021
- my Retired Valentine DSP (but you can use any DSP that'll match the color of your CS )
- a small stamp to place any caption ( I used the retired "Vintage Labels" Stamp Set from 2010 Sale-A-Bration)

Please let me know if you have any questions or suggestions. Please visit my blog and my Stampin Up Website! Have a nice day!

Wednesday, January 12, 2011

Love Buggy Punch Art - Class


Hello, bug lovers! For weeks, I've been busy with creating new little critters for Valentine. Please join me in welcoming Mr. Love Bug. He will fit on your card projects and he will entertain you in a romantic way you'll be dazzled and tickled.

Come join me in my classes and here are my schedules.

Classes are $10 per head and all illustrations, CS and tutorials will be given in class. Just bring your scissors and adhesive (preferably glue). Just contact or email me when you would like to sign up for the class.

Here's another side of him you won't want to miss :) Be surprised on the other posses of Mr. Love Bug you'll be learning in class.


See you there, BON AMI!!!

UPDATE on the Tutorial:
I've been ask by many if my tutorial will be up for sale... Yes :) I'm accepting PREORDERS now for tutorials. The tutorials for these class will be available by Saturday the 15th. Choose your option below and click "Buy It Now". A PDF file will be sent to your email by January 15th.


Tutorial or Class Option


Please let me know if you have any questions or suggestions. Please visit my blog and my Stampin Up Website! Have a nice day!

Saturday, January 8, 2011

10 More Ways with the Mini Heart Box - Wedding Favors


Hi, there! In the birth of these boxes, I found some few inspirations through my followers. With these comments, they openned up new doors for my creations and I just wanted to share them with you.

First of all, I would like to thank Cristy for commenting in my blog which led me to her blog, HokieCoyote. These are the types of projects I see outside my blog, through sharing. Thanks again, Cristy!
I love your blog.

With her inspiration, I integrated my boxes with her card of hearts. I just had a few twicks with the buttons of the groom. I had to use the Jewels Basic Pearls #119247 (used the 2nd to the smallest pearl). With a black Sharpie pen, I colored it so it looked like black beaded buttons...hehe. That's what you can call, "Forced Improvision"... BTW, the tie was made with 2 snipped hearts at the edge.

With the bride's box, I used Shimmery White CS (love this paper so much) #101910 with Basic Gray #121044.
Then used the same Jewels Basic Pearls set (used the biggest pearl in the set).


10 More ideas to these Heart Boxes:

1. You can also make the tie RED so it can be your Valentine favors!!!

2. I would also put an ultra-tiny rosette on the grooms box side so it looks like a buttoneer...hihi.

3. On the bride's box, emboss your cover with Textured Embossing folders

4. Use Rhinestone's instead of pearls.

5. For Valentine's Day, make red and pink boxes and put 3 in a bigger box as a set. Fill them with chocolates and love :)

6. These can be Wedding Ring boxes!

7. Print Name tags of the bride and groom and set them inside, at the back cover.

8. Print out "Thank You" or stamp "Thank You" then punch out with Full Heart Punch, then use this to make the backings of the base of your box. So when they open the box, it says "Thank you" inside!

9. Make these boxes like ornaments. Just punch out a hole on the top of the box and add sheer, satin or lace ribbon. Don't punch a hole on the base of the box because it will not open.

10. For elegant presentation, get those paper doilies for cupcakes and have these boxes lay on them. So beautiful!

Then again, here's the tutorial to my Heart Boxes. Click HERE.


Please let me know if you have any questions or suggestions. Please visit my blog and my Stampin Up Website! Have a nice day!

Friday, January 7, 2011

Mini Heart Boxes - Tutorial


Hello everyone! It's been really crazy this past few weeks, specially in the closing of the year and starting a New Year! I've been lining up my projects up since last month and I think I'm getting things in a roll here.

When I was making this tutorial for the heart boxes, I didn't realize how much effort it took just to put the tutorial together. I was afraid that blogspot might give up on my post and won't even take my entry because it was getting longer. So I decided to make it prettier and much more detailed in a separate tutorial where I can freely show you Step by Step clear illustrations how to make this adorable boxes. Low and behold, it came out to 13 pages of full color illustrations and samples.

These boxes are originals and not copied from anywhere. So this is something out of the usual. If you might have seen it somewhere, I would not have seen it because my time is limited to even look around. So it's pure creation and innovation on most of my projects. My inspirations come from life elements around me. With a management job, caring for my parents, household, and SU! That's a full plate for me :)

I thank all my followers and blog friends for continuing to support this passion of mine where I indulge my thoughts and time into to relieve everyday stress. Thank you again for your kind comments, they really inspire me always.

Ok, let's get back to the boxes. You can fit in 2 Hershey Kisses in them or 1 chocolate nugget. Mints and M&Ms are also a great treat for these boxes. A pair of jewelry (ring, earring gifts). So cute. You can also use this as a Wedding Favor! Very lovely Wedding ensemble for a reception! Or a Bridal or Baby Shower even!

As you can see I used the Scalloped Heart on both sides of the box and it just graced it with love and tender. Not to mention the rosettes! It's just "Flickeristic" and "Scrumpulicious"..hihi. To make the rosettes for the box, I have my tutorial HERE.


FYI, the class to make these boxes are now posted. So hurry and sign up! Here are the schedule for my Valentine classes! Click HERE.

For the tutorial, click the "BUY IT NOW" button for $4.99. A .pdf file will be sent via email disclosed by paypal within 24 hours. If you are my downline, you get all my Tutorials FREE!!!


Please let me know if you have any questions or suggestions. Please visit my blog and my Stampin Up Website! Have a nice day!

Wednesday, January 5, 2011

Mojo Monday 172 - Valentine Rosettes Card


Here are uses of the paper rosettes I've mentioned about in my Tutorial. See how it fits anywhere in a card. In any color or size, it graces any simple card or project like this. I've decided to join the Mojo Monday again this month and I think this is a really good exercise :) I believe it gives me that extra juice on my head to keep those projects coming. hihi.

Supplies Used:
Cardstock:
- Pink Pirouette
- Chocolate Chip Brown
- Whisper White
- Very Vanilla
- Cherry Cobbler Red (for the bigger rosette)
Stamp Set:
- Hostess Occasional Quotes #120142 (Clear)
DSP:
- Jolly HOliday DSP #117159
Punch:
- 2-3/8" Scallop Circle Punch #118874(to set your rosettes onto)
- 2-1/2" Circle Punch #120906 (for the bigger rosette, cut with thinner coil)
- 1-1/4" Circle Punch #119861 (for the smaller rosettte)
Other Supplies Used:
- Elastic Cord - Silver - #109866
- Jewel's Basic Rhinestone - #119246

Here's another look with indoor lighting used:


Please let me know if you have any questions or suggestions. Please visit my blog and my Stampin Up Website! Have a nice day!

Monday, March 1, 2010

Valentine M&M Treats


Whoaaaa!! I completely forgot to share this little treat! I know it's not the first one you've seen but I made a cute version of it. They were such a hit last Valentine's day! You can also make different versions like for Birthday, St.Patrick's day (Green version), Easter, etc.... so many possibilities. I'll be featuring some versions soon. So don't forget to stop by.

It's so simple and inexpensive and yet very cute for a giveaway. The scallop tag just puts the icing on top! I glued some red glitters on the heart. Ain't it cute! I also displayed them on a transparent coffee mug and it looked like a flower bouquet. Here's a closer look at the tag.

Supplies Needed:
Cardstock: p.155-156 (IBC)
- Real Red #102482
- Whisper White #100730
Stamp Set:
- Love You Much #113756 p.44 (IBC)
Ink:
- Melon Mambo #115656
- Real Red Marker #100052
Ribbon:
- 5/8" Satin Ribbon Pretty In Pink #117289 p.27(OMC)
- 5/8" Satin Ribbon Real Red #117286 p.27 (OMC)
Punch
- Scallop Circle Punch #109043 p.186 (IBC)
- BigShot Pennant Die (for outer Scallop Circle) #113483 p.200 (IBC)
- Crop-A-Dial (using 3/16" hole) #108362 p.191 (IBC)
Other Supplies:
- Glitter - Fine Galaxy #114286 p.180 (IBC)
- resealable 1" x 8" cellophane bags
- Valentine M&Ms - 20pcs in each bag

Please let me know if you have any questions or suggestions. Please visit my blog and my Stampin Up Website! Have a nice day!

Sunday, February 14, 2010

Happy Valentine's Day 2010


I hope everyone had spent there day with a love one this special day! I spent my Valentine weekend with my dear friends since Friday. I spoke with them on the phone, made cards with others and had lunch and dinner with them! Here's to all my thoughtful family and friends who had always kept me in their mind and in their hearts.

Here are some of the projects we made over the weekend :)


Please let me know if you have any questions or suggestions. Please visit my blog and my Stampin Up Website! Have a nice day!

LinkWithin

Blog Widget by LinkWithin